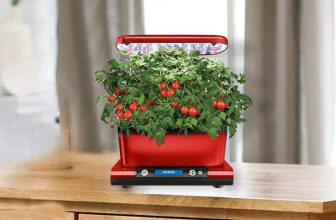
7 Steps to Make a DIY Ebb and Flow Hydroponic System
The hydroponic system comes as the savior when you have no suitable system to grow your desired plant. A hydroponic system is superior to the traditional method and the best for cultivation in every situation.
And, an Ebb and Flow method adds more to this hydroponic system. The most important thing about a hydroponic system is proper water and nutrients; this is done best by the ebb and flow system.
With a sequential water supply and drainage, the system ensures the best use of the nutrients and minimizes water loss.
Further information can be derived through staying with us till the end!
The Definition of Ebb and Flow
The first and foremost thing for executing a seamless hydroponic system is to have a correct idea about their methods. For example, one of the be used strategies of a hydroponic system is the ebb and flow technique.
There are several ways to master this technique for the best type of hydroponic implementation on your plants. But before knowing the forms, you need to know what the ebb and flow methods are!
Cultivating plants with continuous flooding and draining systems is generally known as the ebb and flow method. Here, everything occurs periodically.
The plant is grown in this system under certain growth mediums, also known as the growth substrates. Sand, pebbles, hydroponic Rockwools, clay, and many things can be used as growth substrates.
Plants are supplied with nutrient-enriched solutions through the flooding that works as the alternative to the soil in traditional systems. The round of flooding and drainage makes the process seems like drowning your plants in water. A similar thing is precisely the reason behind comparing this model with deepwater cultivation.
But, in the ebb and flow system, the plants are flooded only for a certain period which is on average for 15 minutes. Then, after that, the flooded water is drained back from where it came from. And this is the difference between an ebb and flow system and the deep water culture method.
Again, for the same reason, your plants’ roots are not submerged in the water for the whole time. Again, it prevents them from getting their roots rotten.
Also, you may think of the supply of proper oxygen levels to your plants as they remain flooded. The answer to this is the very next step of this system which is the drainage of water.
Plants are supplied with ample oxygen at the time of the water drainage system. As a result, when they are again flooded, they do not go through oxygen levels.
Adding air stones also helps to maintain the oxygen level in water during the drowning of your plants. Besides providing oxygen, they also help prevent pathogens and other problems that may arise in the water.
How to Make a DIY Ebb and Flow Hydroponic System: Step by Step Guide
Now that you know about this system of culturing your plants hydroponically, you will no longer face any problem farming in this method.
But, you’ll need all the right ingredients along with following the proper instructions to execute the ebb and flow technique. Besides the readymade ebb and flow kit available in the market, you can also go for a DIY.
You can best suit your needs by establishing a DIY ebb and flow hydroponic system according to your aspect. This will create rooms for your plant to get an artificial way of growing themselves in any situation and without colossal space.
The system is not that much costly and also requires less effort than the traditional method. With less effort, the savings of physically demanding tasks are mentioned.
All you need are these seven simple steps that will help you establish the ebb and flow method and start your farming immediately.
Step 1: Ensuring the grow trays as plant beds
The first step to go with this system is to ensure the beds for your plants to grow. Then, to place your plants, you need to grow trays.
There are two types of ebb and flow systems in hydroponic cultivation, including the series container and flood trays system. For two of them, you need two different kinds of setups for your to grow tray.
In the first system, you need to setups several growing trays in a series. It would help if you had multiple of then expand each plant on each of the grow trays. All the grow trays should be on a similar flat surface so that proper distribution of nutrients is enabled in all of them.
Again, all the trays should be connected with the same overflow tube for a similar reason.
The following is the flood tray system, where you’ll grow your plants in an identical container or grow tray. This requires less assembling effort and also works very well.
The process is also similar to the first one, but the only difference is growing trays.
Step 2: Placing and holding the trays
The second thing that comes on your list is to hold the grow tray. We have missed to tell you that your grow tray should always be at higher levels than the water storage tank. This allows the proper water drainage system.
For this, you need a tray stand to support the tray. Through a frame, you can fit your grow tray at a level higher than the ground. The grow tray will remain safe at that position and get room to stay at a higher level.
Again, the stands will also allow a suitable working environment for you by adjusting an excellent height to the grow trays.
You can also place the water storage below the grow tray due to the leftover space availed to you by these stands.
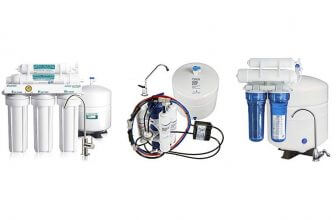
Step 3: Enabling the reservoir for its action
Thirdly, you need to ensure the storage of the nutrients enriched solution. The central aspect of this ebb and flow system is the water supply and drainage.
The water mixed with nutrients is stored in the reservoir, which should be placed under the grow tray. Therefore, the position of the water reservoir should always be lower than the grow tray.
From the reservoir, water will transport into the grow tray to flood the plants. After the duration of the flooding, the same water will be drag back to the reservoir.
You should also take steps so that the reservoir is away from the direct reach of sunlight and high temperature. The pool should further include a lid to cover the nutrient solutions.
Step 4: Transportation of the nutrients
One of the essential functions of this ebb and flow system is carried out by the pump and timer. The pump is the machine that transfers and supplies water from the reservoir into the grow trays.
If you have a sharp memory, then you haven’t forgotten that grow trays are situated at a place higher than your reservoir. So, supplying water under such a circumstance becomes impossible and is against the law of gravity.
So, comes the contribution of the pump in doing that job. A pump forces the groundwater level of the reservoir to transfer to the higher surface of growing trays. Thus, the force of the pump and the height of the growing trays indicate the water level of the trays.
Again, a timer is fixed to do the job more periodically. In addition, a timer will set the water supply time through the pump for a seamless flooding and draining system.
The timer and the pump is adjusted with one another for the perfect execution of the system.
Step 5: Ensuring all-over fittings of the model
Then it comes about taking care of the all-over setup of this model. That includes arrangements of many other small things without which it is impossible to run the ebb and flow system.
This adds to the correct settings of the tubes, the grow tray heights, and a correct timer. You need to ensure the overflow tubes supply the water from the reservoir into the grow tray. It also further includes the sending back of water from the tray to the pool.
The height of the grow tray and the reservoir adjusted by you will indicate the water level inside the grow tray. If the size of the grow tray is more, the water level will be less and vice-versa.
Again, it would help if you also were handy with the timing of flood and drain above which the growth of your plants will depend. The system will follow the timing that you set on the timer.
Step 6: Having the plant pots as per need
The plants you want to grow in this system are placed on plant pots inside the grow tray. In the ebb and hydroponic flow system, the fabrics are mainly used as pots for your plants.
Enough space inside the pots should be suited for the growing of the plant’s roots. The roots should be prevented from rotting.
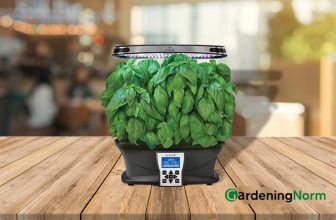
Step7: Paying importance towards all the necessary ingredients
The system is all about creating an artificial environment to sustain your plants. This requires the perfect involvement of growing mediums, proper nutrients, ideal pH level, lights, and required insecticides.
As growing mediums, substrates are used in various forms such as the hydroponic Rockwool, sand, etc., especially for heavier plants. Lighter plants can be sustained in water mixed with nutrients. The best type of growth substrates is sand pebbles, ideal for most types of plants.
The pH level of the soil should be balanced, and a neutral pH level of 7 can be maintained for the majority of cases. A further adjustment of the pH level should be made according to the type of plants.
Final Words
With these simple steps, you can explore your type of Ebb and Flow hydroponics system very easily. However, do let me know if you face any issues while making this amazing hydroponic system.
Disclaimer: GardeningNorm is a participant in the Amazon Services LLC Associates Program and may receive a commission if you purchase a product via a link on this page.. However, this does not impact our reviews.Read the full disclosure here.