
The Complete Guide to the Stages of Growing Asparagus: Planting, Cultivating, and Harvesting

Growing asparagus is a rewarding experience for any gardener. It’s an incredibly versatile vegetable that can be cooked in dozens of delicious ways, and it’s also easy to cultivate. But growing asparagus isn’t just about planting the seeds – there are several stages of growth you need to understand if you want your crop to thrive! In this article, we’ll explore the different stages of growing asparagus so you can produce a bumper harvest every year.
The first stage of growing asparagus is getting the plants established in their beds or pots. You’ll need to choose a spot with well-drained soil, prepare the ground properly, then get ready to plant. This can take some time and effort but will pay dividends when it comes to harvesting later on. Once your plants have taken root and started sprouting, they’ll enter the second stage: vegetative growth. At this point, your asparagus ferns will grow vigorously and may even require careful pruning throughout the summer months in order to maintain healthy foliage.
Finally, towards late summer, your asparagus plants will enter the third stage: flowering and fruiting (or seeding). During this period, your once vibrant green shoots will start producing white flowers before developing red berries, which eventually mature into small black seeds. These seeds can either be collected for next season’s crop or left on the plant for natural reseeding – whichever option you prefer! With these three distinct phases understood, let’s now look at each one in more detail…
Plant Profile Of Asparagus

Asparagus is a perennial vegetable that grows well in many parts of the world. It can be grown from either asparagus seeds or asparagus crowns, which are underground root systems propagated through cloning. When planted correctly and with proper care, an asparagus plant will produce edible spears for up to 20 years. Raised beds are recommended when growing asparagus due to their ability to maintain optimal soil temperature conditions for the plants’ development.
Soil preparation is one of the most important steps in successfully cultivating an asparagus crop. The soil should have good drainage and must be enriched with plenty of composted organic matter such as aged manure or leaf mulch. Asparagus prefers a slightly acidic pH level between 6-7, so it’s best to test your soil beforehand if possible. Additionally, planting at least two varieties of asparagus will increase pest resistance and improve yield potential.
Asparagus Varieties

There are many different varieties of asparagus, each with its own unique characteristics. Here are some of the most common varieties:
Mary Washington: This is the most popular variety of asparagus in the United States. It produces thick, green spears and has good disease resistance.
Jersey Knight: This variety is known for its sweet and tender spears, which are dark green and have a slightly purple tint.
Purple Passion: As the name suggests, this variety of purple asparagus produces spears that are a beautiful purple color. The spears are also slightly sweeter than green asparagus.
UC 157: This variety is prized for its high yields and disease resistance. It produces thick, green spears with a slight purple tinge.
Viking KB3: This variety is known for its early production and high yields. The spears are thick and have a dark green color.
Pacific Purple: This variety produces spears that are a deep purple color and are slightly sweeter than green asparagus. They also have a more tender texture.
Gijnlim: This Dutch variety is known for its early production and uniform spears. The spears are thick and have a bright green color.
These are just a few of the many varieties of asparagus available. Each variety has its own unique flavor and texture, so it’s worth trying a few to find your favorite.
Soil Preparation For Asparagus Growth

It’s time to start preparing the soil for your asparagus crop! Picture a sun-drenched patch of land, with nutrient-rich soil and plenty of moisture. This is an ideal environment for planting asparagus – so let’s get started on creating it.
Organic fertilizer can help give your plants a boost during their early growth stages and ensure they have enough nutrients available to them throughout the season. If you don’t already have organic fertilizer, it’s better to add compost or aged manure before planting. The compost will not only add extra nutrition but also help retain moisture in the soil by improving drainage.
For best results, make sure that the soil has adequate moisture levels prior to planting and maintain those levels through regular watering once planted. Asparagus is particularly sensitive to changes in humidity and needs consistent access to water throughout its development period and moreover, it prefers slightly acidic soil. Adding mulch around the crowns of newly planted asparagus can also help prevent evaporation from strong winds or direct sunlight, ensuring full sufficiency for optimal growth performance.
Caring for the soil properly now means healthy plants later on down the road – so it’s worth taking the time to create an optimal setting before getting started on fertilization strategies for the best harvests possible!
Fertilization Strategies For The Best Harvests
Now that the soil is prepped and ready, it’s time to focus on fertilization strategies for growing asparagus. As a perennial plant, asparagus needs regular feeding year-round to produce healthy harvests. Here are some key factors to consider when fertilizing your asparagus patch:
1. Use a balanced fertilizer with equal amounts of nitrogen, phosphorus and potassium – this will ensure your plants get all the essential nutrients they need throughout their growth cycle.
2. Apply fertilizer in spring after harvesting has finished and again in late summer or early fall before frost sets in; this will help promote strong root development and vigorous foliage growth during warmer months.
3. Don’t forget about female plants! Female asparagus plants require more fertilizer than male plants because they produce seeds, which are an important part of harvesting asparagus. It’s also important to note that over-fertilizing can lead to excess foliage at the expense of flower production so be sure not to go overboard when planting asparagus.
4. Keep an eye on pH levels; if you notice any changes, then adjust accordingly by adding sulfur or lime depending on what type of change is needed (more acidic/alkaline). This will help keep your soil at its optimal level for maximum fertility and nutrient absorption by the roots, resulting in better harvests each season.
As you can see, there are many different factors to consider when planning out your fertilization strategy for growing asparagus but following these tips should help ensure you have successful harvests each season! Now that we’ve covered how best to fertilize your asparagus patch, let’s move onto choosing a suitable location…
Choosing A Suitable Location For An Asparagus Patch

When it comes to selecting the best spot for an asparagus bed, there are a few things that need to be taken into consideration. Knowing where and how to plant your asparagus patch can make all the difference in achieving success with this vegetable.
The first thing you should take into account is sunlight exposure. An ideal location would have full sun throughout most of the day, since partial shade could limit growth significantly. Additionally, soil moisture is key; asparagus likes moist soil but not overly wet conditions so make sure you find a planting area that won’t become waterlogged easily. Lastly, choosing an elevated area will help protect against pests (asparagus beetles and etc.) and weeds while also ensuring good drainage, which is essential for healthy root development. By the way, as long as there is sufficient drainage, asparagus can be planted in raised beds or containers.
By taking these factors into consideration when looking for a suitable location for your asparagus patch, you can ensure it has everything it needs to reach its maximum potential! As such, selecting varieties with bigger spears or higher yields becomes easier and more rewarding.
Selecting Varieties With Bigger Spears
When selecting asparagus varieties, look for ones that produce bigger spears. As there are male and female plants, many gardeners opt for male plants because they tend to grow larger than female plants. To ensure the biggest harvest, plant two or more varieties of each gender near one another in a well-drained bed with lots of sun exposure. This way, you can get a variety of sizes and shapes from your crop.
The age and growth stage at which you harvest is important, too; if harvested too early, spears may be thin and stringy, but if harvested late, they’ll become woody and tough. Asparagus grows best when harvested during its peak season – typically between April and June, depending on where you live – so make sure to plan ahead!
Once it’s time to pick your asparagus spears, use scissors or pruning shears instead of pulling them off by hand. This will help keep the stems intact and prevent damage to other nearby shoots. With these tips in mind, you’re now ready to start harvesting some delicious asparagus! By following proper seed germination techniques and planting different varieties with varying-sized spears, you can enjoy bumper crops with minimal effort all season long.
Seed Germination Techniques
The anticipation of a lush asparagus bed is bubbling up inside us, but we must take the necessary steps to get there. Seed germination techniques will be our bridge toward realizing that dream.
Like any seed, asparagus seeds need water and warmth in order for them to germinate successfully. | Temperature & Humidity Requirements |
:–|:-:|
Warmth (optimal temperature)| 17-20°C / 63-68°F
Humidity Level (optimal) | 70 – 80 %
In preparation for planting, sow your asparagus seeds indoors 6 – 8 weeks before the last frost date in your region. Whether you’re using pots or flats, make sure that they have drainage holes at their base so that excess water can escape and not drown the emerging sprouts. Fill these containers with moistened potting soil mix and each container should only hold one or two seeds per inch depth in the soil surface. Cover lightly with more soil and then keep it consistently moist – this step is key! You may even want to cover your tray/pot with plastic wrap to help maintain humidity levels during the early stages of growth until your plants are established enough to handle exposed conditions better. The young tender spears will start appearing after about 2 weeks; just remember to give them plenty of light once they emerge from the ground.
Seed germination techniques require patience – much like gardening itself – but if done correctly, you’ll be rewarded with beautiful green spears popping out from beneath the earth’s surface soon enough! Now that you’ve taken care of getting those precious little starts off on the right foot, it’s time to enter dormancy mode and prepare for harvesting season ahead!
Entering Dormancy Of Asparagus Plants
As the season begins to cool, asparagus plants will enter dormancy. It is important for gardeners to understand this process in order to properly take care of their plants and ensure a good crop each year. Here are some key points about entering dormancy of asparagus plants:
* As the temperatures drop below 50 degrees Fahrenheit, asparagus plants go dormant and stop producing spears from the ground level.
* This also allows them to focus on seed production instead of spear growth, which helps with future harvests down the line.
* During this time, it is essential to keep an eye out for pests such as the asparagus beetle that can damage your plant if left unchecked.
* Pruning back dead foliage near the end of dormancy ensures healthier new growth when spring returns.
Once winter has passed and warmer weather returns, it’s time to start preparing your beds with crowns or rhizomes to cultivate asparagus.
Starting With Crowns To Cultivate Asparagus
After entering dormancy, the next step in growing asparagus is to start with crowns. According to research, the best time of year to plant asparagus crowns is six weeks before the last frost date. To get started, you’ll need to prepare a 4-8 foot wide and 8-inch deep trench for your asparagus beds. Put about an inch of compost into the bottom of the trenches and then spread out your asparagus crowns over it. Cover them lightly with soil from either side of the bed and then water thoroughly so that all roots are covered completely by moist soil.
To help prevent weed growth, cover the area between plants with straw or mulch after planting. This will also help keep moisture levels consistent while avoiding erosion during periods of heavy rain. The final task is to keep weeds at bay by regularly weeding around your planted asparagus crowns; this helps ensure good air circulation and healthful root development in the following season’s crop.
In order for successful cultivation, proper care must be taken when selecting and preparing asparagus crowns for planting. Ensure that they come from healthy stock, have strong roots attached to them, and are free from disease or pests before putting them into their designated beds. With these steps followed carefully, you’re sure to see great results from your new crop of asparagus! Now that starting with crowns has been discussed, what follows next is exploring the early growth characteristics of asparagus plants.
Early Growth Characteristics Of Asparagus
In early spring, asparagus is one of the easiest vegetables to grow. It’s a hardy perennial which means it will come back year after year with minimal effort on the part of the gardener. Asparagus plants need well-drained soil and plenty of sunshine in order to thrive. Understanding the stages of growing asparagus spears can help gardeners get off to a good start when planting their own crops.
At first, plant shoots may appear spindly or weak due to limited root development during the seedling stage. However, by mid-spring, these same shoots should have grown into strong stalks that are ready for harvesting. Asparagus growth continues throughout summer and fall until cold temperatures arrive and all foliage turns brown from frost damage. During this time, established roots provide nutrients needed for the next season’s crop, while underground rhizomes spread out over an area four times larger than what was planted originally.
As long as proper care practices such as mulching and fertilizing are followed, each successive harvest will yield bigger harvests every year until there’s no more room left in the bed for new plants. This makes understanding the stages of growing a critical factor for those interested in producing large amounts of fresh asparagus at home.
With knowledge about its early growing season now in hand, aspiring asparagus growers are better prepared to move onto another important step: growing asparagus in pots and containers.
Growing Asparagus In Pots And Containers
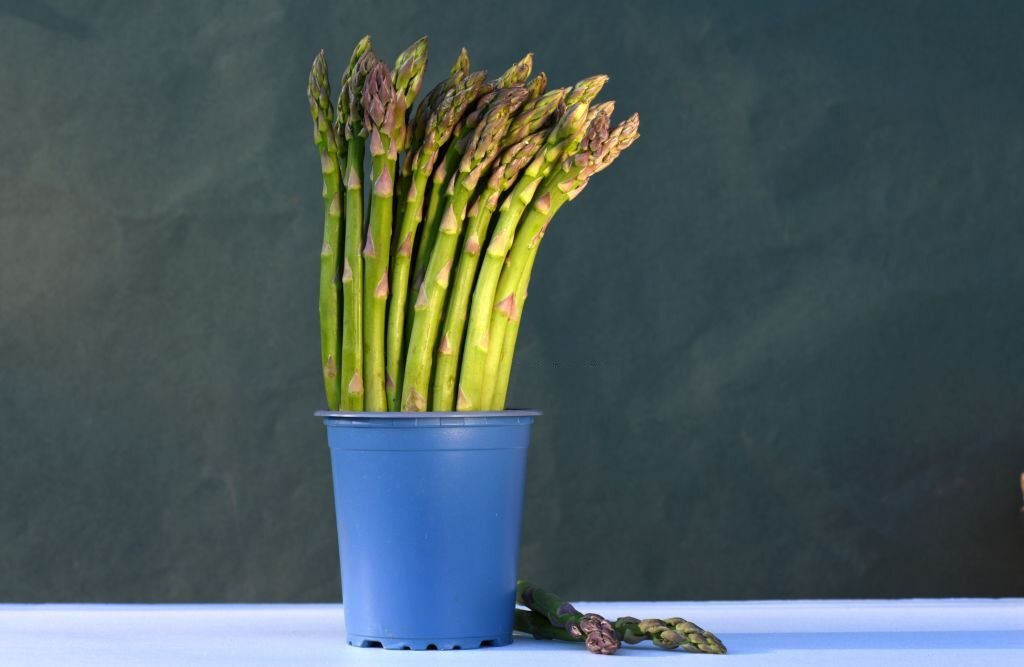
Growing asparagus in pots and containers has its advantages, such as being able to control the soil temperature. It also offers an opportunity for those who don’t have much space in their yard to grow this vegetable. When growing asparagus in a pot or container, it is important to choose male plants since female plants bear fruit which requires more energy and resources than males do.
Weeds management is especially necessary when growing asparagus in pots or containers because of the limited space available. Regular weeding will help prevent competing vegetation from taking away nutrients that are needed by the asparagus plant. Additionally, newly planted crowns should be given extra attention during the first year with adequate water and nutrition, including adding compost if possible.
Asparagus can last up to 15 years when grown correctly, so providing proper care and maintenance throughout each stage of growth is essential for having a successful harvest. With these tips on growing asparagus in pots or containers, you’ll be ready to take your next steps toward cultivating and harvesting this delicious vegetable.
Steps For Cultivating And Harvesting Asparagus

Cultivating asparagus is an important step for a successful crop. The first step in cultivating and harvesting asparagus involves preparing the soil in early spring, before temperatures rise too high. With proper weed management, you will be able to keep your garden free of weeds during the growing season.
When it’s time to harvest asparagus, it should be cut with a sharp knife at ground level when they are no longer than 10 inches tall. To prevent ferning out of the plant, only harvest one-third of the total number of spears each year. This helps ensure that there is enough energy stored in the roots for future harvests. Additionally, cutting off any flowers or flower stalks on mature plants also ensures more nutrients are available for growth.
You can harvest asparagus until late summer or early fall, depending on temperature and rainfall patterns. As soon as warm weather arrives and soil temperatures rise above 60°F (15°C), however, it’s best to stop harvesting altogether so that new shoots have plenty of time to grow and replenish by autumn. By following these steps for cultivating and harvesting asparagus, you’ll enjoy nutritious fresh vegetables all season long! Now we turn our attention to causes and solutions for ferning out of the plant.
Causes And Solutions For Ferning Out Of The Plant

Asparagus ferns are an integral part of the asparagus plant growth and are necessary in order to ensure successful yields. Unfortunately, sometimes these ferns can become damaged by pests or disease and cause ferning out of the plant. Two common causes for this issue include asparagus rust and fusarium wilt.
Asparagus rust is a fungal infection that typically attacks plants during periods of high humidity and temperatures between 70-80 degrees Fahrenheit. The best way to combat this fungus is to retain soil moisture around the roots of the plant and spray a fungicide currently used on asparagus crops. Additionally, it’s important to remove any infected leaves from the crop immediately in order to prevent the further spread of the spores.
Fusarium wilt, on the other hand, is caused by a soilborne pathogen that thrives in waterlogged soils with poor drainage. To prevent this type of infection, farmers should take steps such as improving their soil quality through aeration practices or adding organic matter like mulch or compost in order to improve drainage capabilities. Additionally, they should avoid watering too frequently or overfertilizing their fields since both can encourage the growth of Fusarium species in soil.
By taking preventive measures against these diseases and being mindful when caring for your crop, you can help prevent ferning out of your asparagus plants before it becomes an issue. Now let’s move onto recognizing symptoms associated with fusarium root and crown rot so we can properly diagnose our crops if needed.
Recognizing Fusarium Root And Crown Rot Symptoms
As the asparagus plants grow, it’s important to watch for signs of Fusarium root and crown rot. The first sign is a wilting in the leaves or stems of the plant; this can be diagnosed by using a sharp knife to cut into the stem and examining its interior. If an orange-brown discoloration is present within the stem, then the Fusarium root and crown rot has likely taken hold.
To prevent the further spread of this fungus, steps should be taken immediately to reduce weed growth around affected beds while also ensuring that soil conditions are slightly acidic. Early winter is usually when Fusarium root and crown rot makes itself known, so regular monitoring during this time period is especially essential. It’s possible to stop its advance with timely treatment if caught early enough.
In addition, pests that commonly harm asparagus plants include asparagus aphids, asparagus beetles, asparagus miners, snails, cutworms, and slugs. Regularly monitor plants for pests and get rid of any eggs or larvae you uncover.
The danger posed by this particular fungal infection is real but manageable with diligent caretaking of your crop year-round. Allowing you to safely harvest healthy asparagus plants in their peak season – free from worry about potential contamination due to Fusarium root and crown rot symptoms.
Investigating How Deep Do The Roots Grow
One may be surprised to learn that asparagus plants require deep root systems in order to grow and regrow successfully. However, this is the case when it comes to homegrown asparagus; these plants need enough depth for their roots to take hold and spread out into the soil. Investigating how deep an asparagus plant’s roots can go is essential when determining appropriate growing stages.
The first step to understanding how far down the root system of a particular species of asparagus grows is to observe its natural environment. Asparagus naturally grows in damp soils with plenty of organic matter present, so those conditions should be taken into account when considering ideal depths for a home-grown crop. This means that if the soil has been heavily compacted or lacks nutrients, then deeper planting will be necessary for successful growth and regrowth during future seasons.
Lastly, it’s important to remember that different varieties of asparagus have varying root depths. For instance, wild asparagus tends to have much shallower roots than its cultivated counterpart – meaning less digging may be needed prior to planting. Therefore, do research on your specific variety before going ahead and digging! With the right knowledge and preparation, you’ll soon find yourself harvesting delicious homegrown asparagus in no time at all!
Frequently Asked Questions
✅What Is The Best Time Of Year To Plant Asparagus?
Planting asparagus is an excellent way to add flavor and texture to your garden. It's a perennial crop that can be harvested for up to 20 years with proper care, so it's certainly worth the effort! But when should you plant asparagus?
The best time of year to plant asparagus depends on where you live:
1. In warmer climates, such as USDA zones 8-10, planting should occur in fall or winter, prior to the first frost.
2. If you're located in colder climates (zones 3-7), wait until spring after the last frost has passed and soil temperatures have reached 60 degrees Fahrenheit.
3. When planting from seedlings, consider starting them indoors six weeks before your average last frost date and transplanting outdoors once they reach 6 inches tall.
4. For established crowns, look for ones with tight buds and no signs of disease; then dig trenches 12-18 inches deep and cover lightly with soil during the optimal season for your area.
Asparagus may not produce spears for several months after being planted, but if cared for properly - plenty of sunlight and water - it will reward you with delicious harvests each year! With patience and some dedication, you'll soon be enjoying homegrown veggies right off the vine!
✅Are There Any Organic Methods To Treat Fusarium Root And Crown Rot?
Organic methods are often preferred when treating plant diseases, but can they be effective against fusarium root and crown rot? Fusarium is a fungal infection that affects asparagus, causing the roots to become discolored and weak. It also causes crowns to die back or become stunted. In order to successfully treat this disease organically, it's important to understand the symptoms and how organic treatments work.
Organic treatments for fusarium involve using natural products such as copper fungicides or neem oil sprays. These products help reduce the amount of fungus in the soil and on plants by killing spores before they spread further. Additionally, composting and crop rotation can help prevent future outbreaks of fusarium since these practices improve soil health and discourage fungi from developing. Furthermore, removing infected plants immediately helps stop the spread of disease throughout an asparagus patch.
When dealing with any form of plant disease, it’s best to take preventive measures first so that treatment isn’t necessary at all. Planting in well-drained soils during cooler times of the year will help ensure healthy growth while avoiding potential problems like fusarium root and crown rot. Asparagus should also not be planted too deeply nor overfertilized as both conditions increase susceptibility to fungal infections like fusarium. If prevention fails, however, then utilizing organic methods could provide an effective solution for controlling the problem without resorting to chemical agents.
✅How Long Does It Take For An Asparagus Plant To Reach Maturity?
Asparagus is a popular vegetable that provides a delicious addition to many meals. But how long does it take for an asparagus plant to reach maturity? Generally, most varieties of asparagus will reach full maturity in 3-4 years:
1. Year one: Planting the crowns and allowing them to establish roots.
2. Year two: The plants should begin to produce new shoots each spring.
3. Year three: Harvest can commence with the light harvesting of spears over the course of several weeks.
4. Year four (and beyond): With proper care, your asparagus bed can provide you with food for up to 20 years!
In order to get the best possible harvest from your asparagus plants, there are some important steps you'll need to take during their growth phase, including providing plenty of sunlight and water, keeping weeds away, and fertilizing every few months throughout the season. Additionally, if diseases such as fusarium root or crown rot occur, organic methods may be used to treat them effectively without causing harm to the environment or any nearby wildlife habitats.
Overall, growing asparagus requires patience but yields great rewards once it reaches maturity — both in terms of taste and longevity! With dedication and understanding of its needs on your part, you'll soon have a thriving crop yielding tasty vegetables for years to come!
✅How Often Should Asparagus Be Harvested?
Harvesting asparagus is an important part of the process when growing this vegetable. Asparagus plants take a long time to reach maturity and will produce for many years once they do, so it's important to know how often you should harvest them. To get the most out of your asparagus crop, there are several factors to consider.
Anecdote: A friend of mine has been harvesting asparagus from his garden for over 30 years. He told me he harvests during the spring and early summer months, cutting only spears that have reached at least six inches in length. This ensures that each plant can continue producing more stalks while still giving him enough mature spears to enjoy throughout the season.
The type of asparagus also affects harvesting frequency. For example, some varieties require more frequent harvesting than others due to their higher yield potentials. Additionally, different soils may affect how much water or fertilizer is needed for optimal growth—both of which could influence how often you need to be harvesting asparagus spears.
Different climates may also play a role in determining when and how often you should be harvesting your asparagus crops — warmer areas tend to require less frequent harvesting due to faster growth rates compared with cooler regions where growth is slower but longer-lasting. However, regardless of climate or variety, it’s best practice not to remove all available shoots if possible; leaving a few behind helps keep new ones coming back sooner rather than later!
As with any gardening project, proper planning ahead of time regarding planting dates and post-harvest care will go a long way toward ensuring successful yields year after year. With a little patience and effort on your part, you'll be able to reap the rewards of eating delicious homegrown asparagus whenever you want!
✅Are There Any Special Requirements For Growing Asparagus In Pots And Containers?
Growing asparagus in pots and containers is a great way to enjoy this delicious vegetable. However, there are some special considerations that need to be taken into account when cultivating it in these environments.
When planting asparagus in containers, good drainage is essential; otherwise, water can easily become stagnant, leading to root rot or other issues. It's important to select a pot or container with holes in the bottom so excess moisture can escape freely. The size of the container should also be considered carefully – larger containers may require more frequent watering but typically allow better soil aeration, which helps encourage healthy growth. Additionally, using high-quality potting soil is recommended for optimal results.
For best results, fertilizing your plants on a regular basis is advised. Asparagus requires plenty of nitrogen-rich fertilizer throughout its three-year cycle before harvesting begins. A balanced fertilizer such as 10-10-10 works well for promoting strong root development and lush foliage growth during the spring months. Finally, when temperatures begin to rise, consider shading your potted asparagus from direct sunlight by providing shade cloths or mulching around the base of the plant.
Overall, while growing asparagus in pots and containers takes additional forethought and care compared to traditional methods, following these guidelines should ensure success. With proper attention given to water drainage, soil type and nutrition levels along with adequate sun protection during warmer months - you'll be able to reap a bountiful harvest of nutritious vegetables each season!
✅What Are The Health Benefits Of Eating Asparagus Plants
Asparagus is a nutritious, perennial vegetable that provides numerous health benefits. The spears emerge from the soil in spring and can be harvested for green asparagus or allowed to grow until they produce seeds. Asparagus plants are also resistant to many common pests like asparagus beetles, making them easy to maintain.
Nutritionally, asparagus has plenty of vitamins K and A, which help with healthy bones and vision respectively. It also contains vitamin C, fiber, folate and thiamin which all have their own unique health benefits. Eating asparagus can lower cholesterol levels due to its high antioxidant content, while studies suggest it may even protect against cancer by fighting off free radicals in the body.
In addition to its nutritional value, eating asparagus can offer other health advantages, such as boosting immune system functions and providing anti-inflammatory properties. This makes it an ideal food choice for those who want to improve their overall well-being.
Conclusion
It’s incredible how resilient asparagus is! With the right amount of care, you can enjoy a bounty of fresh asparagus for years to come and moreover, it is really easy to grow asparagus. Planting during the spring months, when temperatures are mild and the soil is still cool, provides optimal conditions for success. Taking steps such as avoiding overcrowding or Fusarium root and crown rot treatments will help ensure your plants remain healthy.
Although some growers harvest a few spears in the second year, in general, asparagus can be picked three years after planting. You’ll want to harvest every few days once spears reach 6-8 inches tall – this ensures they don’t become woody. If you’re limited on space but still want to grow some of your own delicious vegetables, container growing is an option too! Just make sure to choose a pot that’s at least 10 inches deep so that roots have plenty of room to spread out.
With just a bit of effort and patience, it’s easy to reap the rewards of homegrown asparagus year after year! It’s truly remarkable how much flavor and nutrition these slender green stalks contain; nothing beats eating something you’ve grown yourself!

